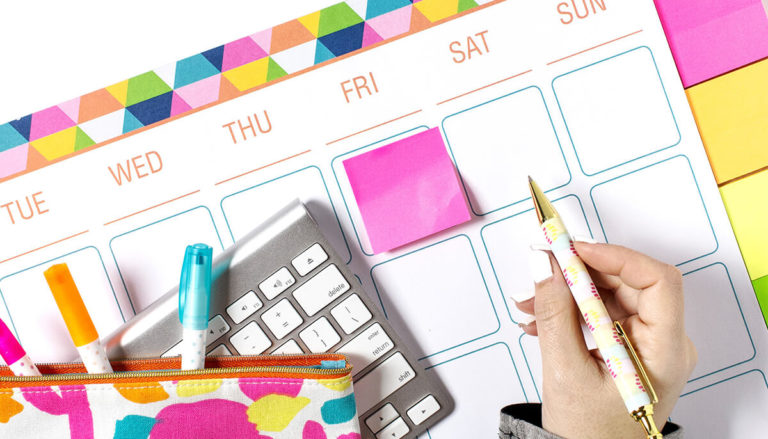
How to set up a Math Calendar Board
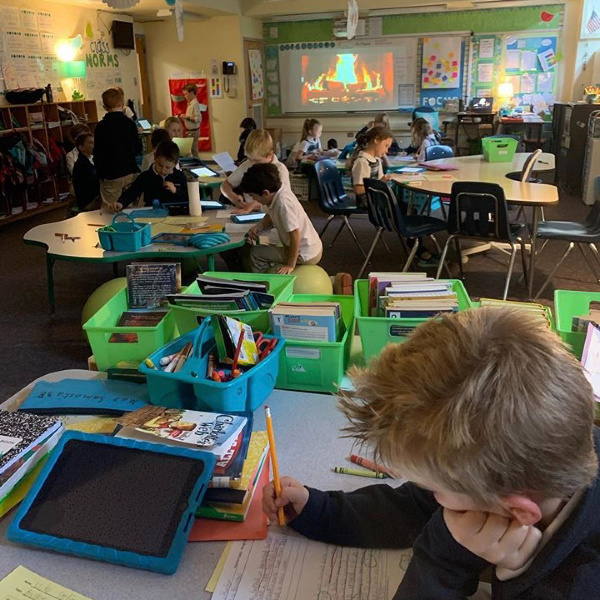
If you teach primary grades, one of the best instructional decisions you can make is to set up a Math Calendar Board. This board is structured so that it becomes an instructional tool that is used daily for primary students to absorb content through repetition.
Using this instructional tool correctly will take between 20-30 minutes each day but it is time well spent. I used to select a student helper each day who got to “do” many of the things on the calendar, along with being line leader and paper passer for the day.
I first began using a math calendar board during the heyday of “Math Their Way.” My board was always structured very similar to the ones they advise teachers to use.
**
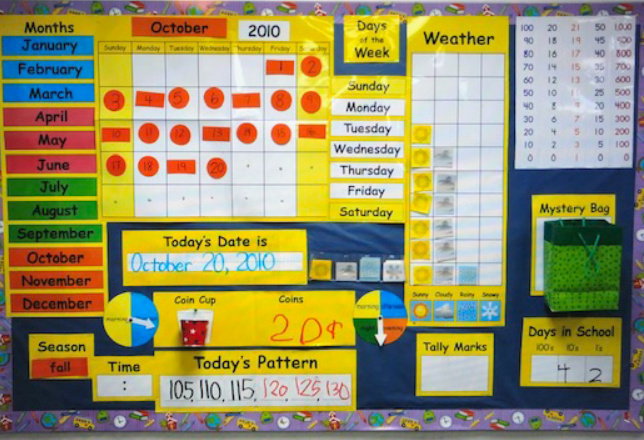
How to set up a Math Calendar Board
I know the board above is already ten years old, but the concepts haven’t changed and neither has the fact that young children need to learn all of these concepts. The photo above shows some slightly different items than the ones I list, but it is very similar.
Below I will list the items that should be displayed on this Math Calendar Board.
- a calendar poster
- calendar numbers for each month with different patterns
- a number line from adding machine tape
- today’s date; “Today is Tuesday, September 8, 2020“
- the days of the week in order from Sunday to Saturday
- months of the year beginning with January
- pockets for yesterday, today, and tomorrow.
- a weather graph chart
- a blank “tooth”
- a blank “birthday cake”
- “unifix cube” tray to show odd/even days
- plastic see-through cups for the number of days sticks
- set of thick markers (black, red and blue)
- a large “Judy” instructional clock
- a laminated page for a tally chart
I’ve noticed on Pinterest that some teachers are doing these Math Calendar practices on the computer with the display enlarged on a screen. I don’t recommend this format. I think, for young children especially, much of the learning is from the repetition of being able to look at it all day long in the classroom. But if your room lacks bulletin board space, then that would be the next best thing.
You should also have an ELA Focus Wall
Another type of instructional board that many Language Arts curriculum texts recommend (especially for Elementary students) is the Language Arts Focus Wall. I wrote an article about this wall earlier. You can read it here.
10 Steps to Create the Perfect Language Arts Focus Wall
Now for some details on your math calendar board.
Having all of the items in the list above provides so much math knowledge for your children without them even realizing it. For the calendar itself, each daily number is hung up that day and after about 4-8 days there is a pattern that you teach and discuss.
You begin the year with a-b-a-b-a-b, then you move forward from there; such as a-b-b, a-b-b, a-b-b. The students get very good at this as the year goes on. You can show these patterns with either colors or shapes. Begin the year with the students actually naming the pattern; red, blue, red, blue OR circle, square, circle, square. In January you can connect the ABC concept of patterns to the literal pattern they see.
The number line made with the adding machine tape doesn’t become instructional for about 2 weeks, because you add a number for each day you are in school. This does not include weekends. Most numbers are written in black marker. But each time you get to counting by 5’s number, you write that one in red marker.
When you get to the twentieth day of school you teach the students that there are two other ways to count which is by 5’s and 10’s. So, you point to 5 (which is in red), then 10 (also in red), up to 20. After teaching counting by 5’s, you take a blue marker and circle 10 and 20. And explain that people also count by 10’s sometimes. From that point on, all 10 numbers are written in red and circled in blue.
Each day you count the numbers aloud together; by 1’s, 5,s, and 10’s. Later in the year you can also introduce counting by 2’s which I used to call “Froggie counting” because we would jump over the odd numbers. Then we would add this counting also (but I didn’t do this one every day).
Before I go into the next concept, I want to be sure to offer you this FREE download of 101 Teaching Tips. Just complete the form and I will zip it right over to you.
**
Teaching days, months and time concepts
Another thing that students recite daily is the date, the days of the week (in order from Sunday), and the months of the year. There is also a section where you designate what date/day is today, what date/day was yesterday, and what date/day tomorrow will be. Make sure the whole class recites each of these with you. For example, “Today is Wednesday, October 15, 2020.”
When you return to school each Monday you can discuss that yesterday was Sunday when there wasn’t school, and what did some of them do yesterday? Then allow 3-4 students to tell you. Each Friday you will discuss that tomorrow will be Saturday and there won’t be school so they can spend time with their families.
This repetition of these days/dates cements the concept of time in regards to days, weeks, and months. Eventually, students being to understand the difference between weekdays and weekends.
Other Calendar items
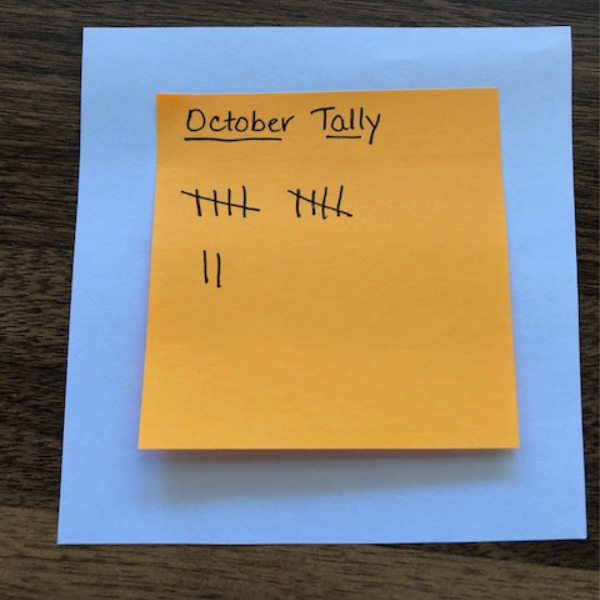
Another item you should incorporate is a tally chart. This chart also only marks days at school (not including weekend days). Adding to this chart teaches the concept that there is a way to keep the count of items in groups of five.
As soon as you are on the tenth day of school, you can show the students the similarity of counting by 5’s and counting the tally chart. But the difference is after you count the 5’s you add on the remaining ones. So in the picture below the students and you count; 5, 10, 11, 12. This teaches the concept of adding on.
**
Other items are the weather chart, the tooth chart, and the birthday cake. The weather is recorded each day in a graph format. The tooth is to write the name of any child who has lost a tooth that month. And similarly, the birthday cake is to write the names of the children who have birthdays that month.
A small introduction to place value
Another “calendar” item where you begin to introduce place value to students without them even realizing it uses the clear cups mentioned above. You get the red or black stir sticks that restaurants have (you can get them at Costco, Sam’s Club, or Smart & Final). You also get three clear plastic cups and write (in large letters) ONES, TENS, HUNDREDS on a cup.
Staple or pin them to the board in the correct order with ones to the right (when students look at it). Then the student of the day adds a stick each day to the one’s cup.
THEN WHEN THERE ARE TEN, you rubber band them together and move them to the tens cup. These sticks are also for every day you are in school (thus will match the adding machine tape number line).
When you reach the 100th day of school, you will take the ten ones and rubber band them, then WITH A LOT OF FANFARE, take the ten batches of ten sticks and use a BIG RUBBER BAND to band them all together to make a hundred.
Using a “Judy” clock
When teaching Kindergarten or first grade, don’t introduce the clock concept until about November. If your class is pretty immature, wait until January. The main point is that the other portions of the calendar (listed above) need to become very automatic and routine before introducing the clock concepts.
When teaching about the clock, the first thing you need to tell them is that counting the clock is different because you only go to 60 instead of 100. Then the next thing you teach them is that there are 24 hours in each day, so the clock has to circle twice around to make a whole day since 12+12=24.
More details about telling time
Have the class count the numbers around the clock with you as you hold the big hand onto the 12 and move the small hand to each hour, by saying “o’clock” after each number. Do this for about a week. Then tell them it’s time to learn the next clock rule which is the “thirty.”
Now you can have the gears of the clock actually move the small hand as you move the big hand from 12 to 6. As you move it around, you and the students chant; “one o’clock, one-thirty, two o’clock, two-thirty, three o’clock, three-thirty,” ……up to 12 o’clock.
DO NOT TEACH ANYTHING ELSE ON THE CLOCK FOR ABOUT 2-3 MONTHS (with Kinder and 1st grade). Let this repetition sink into their little brains.
Then you introduce the fifteen and forty-five. You can mention that when the big hand gets to each number we count by 5’s. But don’t expect this concept to sink in yet for them.
Just switch (as in increase) the repetitious clock counting to be; “one o’clock, one fifteen, one thirty, one forty-five, two o’clock, two fifteen, two-thirty, two forty-five, three o’clock…..up to 12 o’clock. Do this daily for about a month or two (depending on how close you are to the end of the year).
Kindergarten students don’t really need to learn the five-minute intervals, but if your class is advanced you can begin to introduce it towards the end of the year.
That is just about everything I used to teach on this primary grade math calendar wall. If you want to see other aspects or examples of other boards, go search through Pinterest.
Have fun, and Good Luck!
Until Next Time,